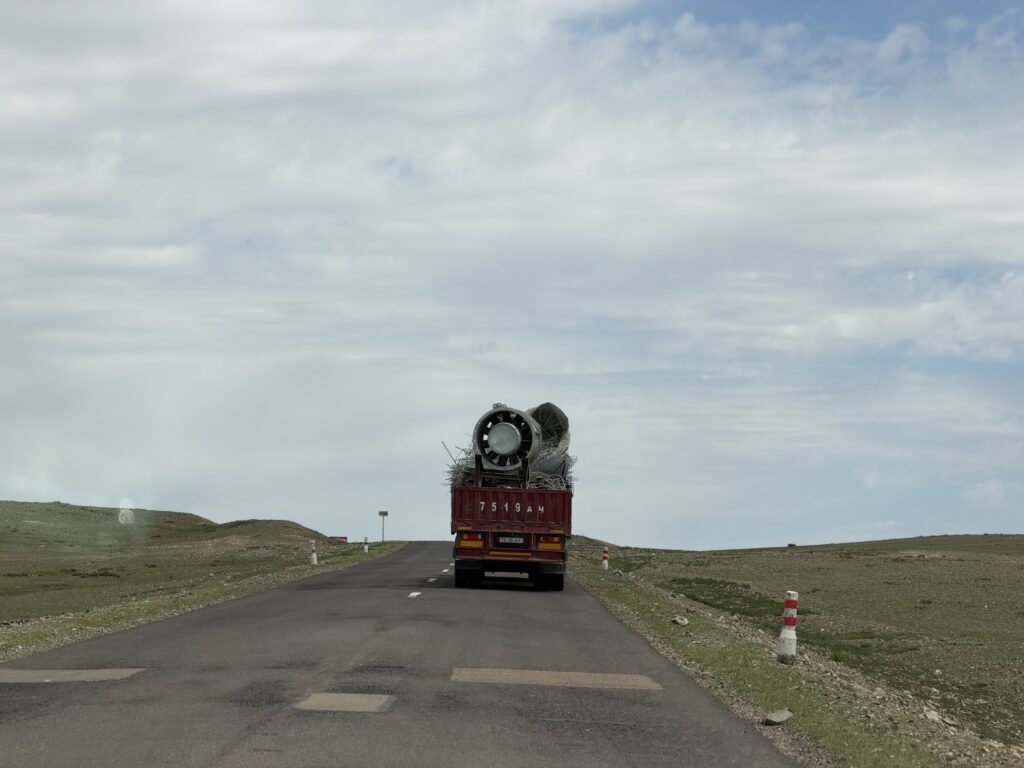
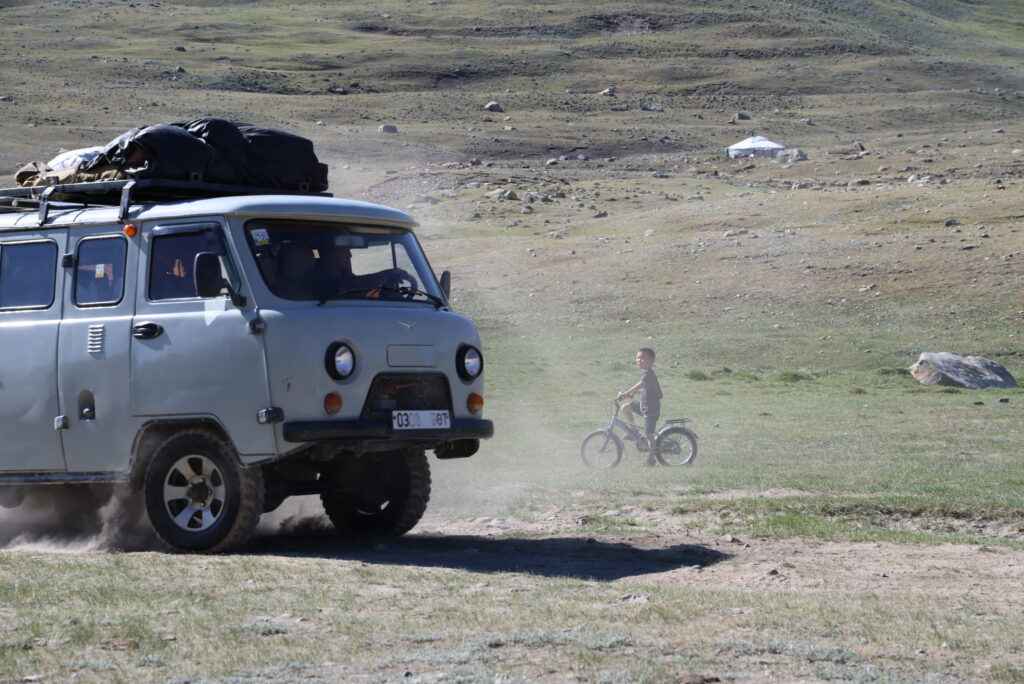
One of the things that caught my attention while traveling on Mongolia’s roads was the way drivers use their turn signals while passing.
On a long two-lane road, I would see the vehicle in front turn on a blinker even though it was not about to turn. It took me a while to understand that the signal was meant for the driver behind it: a small piece of road-to-road communication about whether the way ahead looked clear enough to pass.
Why passing is awkward in Mongolia
Mongolia drives on the right, so vehicles pass on the left. But many of the cars on the road are Japanese imports, especially Toyota Priuses, and are right-hand drive. I wrote earlier about why there are so many Toyota Priuses in Mongolia.
That combination puts the driver of a right-hand-drive Prius on the far side of the car from the center line. When following a truck, bus, or another car, it can be hard to see far enough into the oncoming lane to decide whether a pass is safe. The driver has to edge left for a look—the very maneuver that can make passing riskier.
The blinkers become a shared signal
Drivers have developed a practical convention. The vehicle in front may use its signals to communicate what it can see farther up the road:
Left signal: do not pass; it is not safe to pull into the oncoming lane.
Right signal: the road ahead appears clear, so it may be possible to pass.
The official rule is clear about the left signal: it warns that passing would be dangerous. The corresponding right signal appears to be an informal countryside convention, described by Mongolia driving guides and local drivers as meaning that the road ahead looks clear enough to pass. It is still not permission or a guarantee.
A solution shaped by the cars on the road
I like this little detail because it is such a visible example of people adapting to the vehicles and conditions around them. Imported right-hand-drive cars are not especially well suited to a country that drives on the right, but Mongolia’s drivers have found a simple way to share a bit more visibility when it matters.
It is easy for a visitor to mistake a blinking turn signal for an upcoming turn. On a two-lane Mongolian road, it may be part of an entirely different conversation.
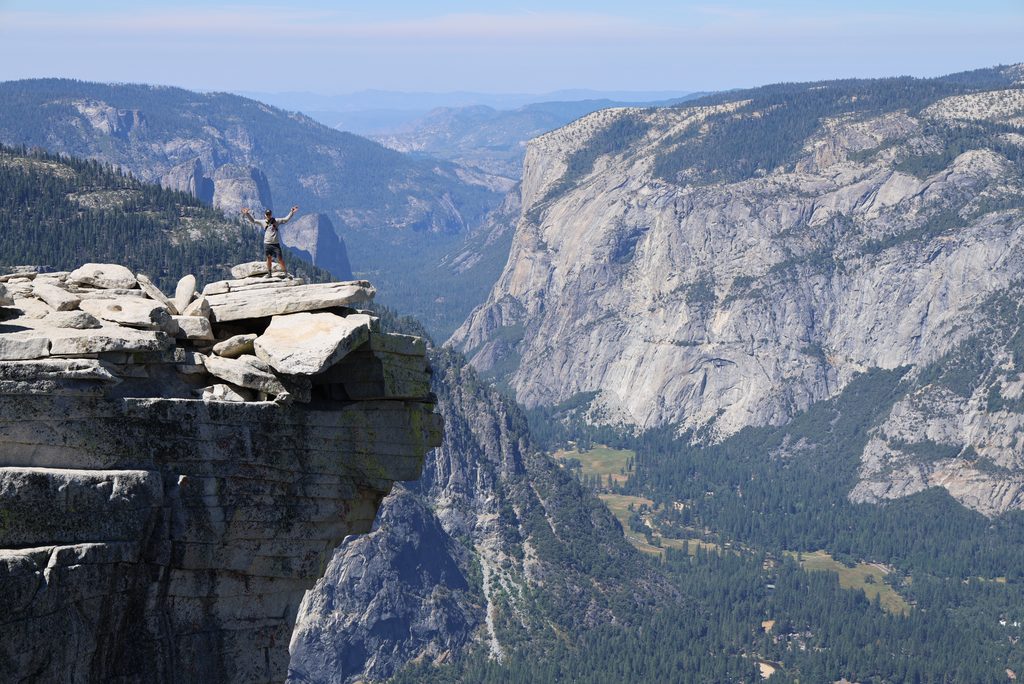
The first time I hiked Half Dome was sometime in the late 1980s. I
went with my dad and my cousin. We backpacked up to the bottom of Sub
Dome, spent the night, woke up early the next morning, and climbed to
the summit.
We had Half Dome almost completely to ourselves.
There was no lottery. No Recreation.gov. No $10 application fee. No
ranger checking IDs. You just hiked up and climbed the cables.
Things have changed.
Today, Half Dome is still one of Yosemite’s classic hikes, but
getting permission to climb the final section can be one of the hardest
parts of the trip.
The National Park Service describes the standard Half Dome hike from
Happy Isles as about 14–16 miles round trip with 4,800 feet of
elevation gain, typically taking 10–12 hours.
(NPS)
And when the cables are up, you need a permit to go beyond the base
of Sub Dome. Yosemite allows about 300 hikers per day: approximately 225
day hikers and 75 backpackers. (NPS Half
Dome permits)
In August 2026, I learned just how frustrating that permit system can
be.
I lost the preseason lottery.
Then, while we were actually in Yosemite, I entered the daily lottery
over and over again.
I lost every time.
On our last full day in Yosemite, we decided to hike anyway.
Not because we planned to sneak past the ranger.
We had another idea:
Maybe somebody else would have extra room on their
permit.
It worked.
Half Dome Didn’t Always Require a Permit
Until 2010, there was no Half Dome day-hiking permit system.
That sounds almost strange now, but for decades anyone could hike to
the cables and climb Half Dome.
The problem was that Half Dome became extremely popular.
Before permits, Saturdays and holidays were averaging around
840 people per day, and peak days saw roughly
1,100 to 1,200 people using the cables. Yosemite
reported waits of an hour or more just to get onto them. (NPS 2010
permit announcement)
In response, Yosemite introduced an interim permit system in
2010.
At first, permits were required only on Fridays, Saturdays, Sundays,
and federal holidays. Yosemite allowed 400 people per day: 300 day
hikers and 100 backpackers. The permit itself was free, although
Recreation.gov charged a $1.50 service fee per person.
(NPS)
Contrary to what I had remembered, these weren’t initially walk-up
permits. They were available on a first-come, first-served basis through
Recreation.gov or by telephone.
In 2011, Yosemite expanded the permit requirement to
seven days per week. (NPS)
Then, in 2012, Yosemite replaced the first-come,
first-served system with a lottery. That included a preseason lottery
and a second lottery held two days before each hiking date. (NPS)
That’s essentially the system we still have today.
Year
Half Dome permit system
Before 2010
No permit required
2010
First-come, first-served permits for weekends and holidays
2011
Permits required seven days a week
2012
Preseason and daily lotteries introduced
2013
Permit system adopted as the long-term management plan
2026
Preseason + two-day-ahead daily lotteries
How to Get a Half Dome Permit in 2026
There are three primary ways to legally get access to Half Dome.
1. Win the Preseason Lottery
This is where I would start.
The preseason lottery runs from March 1 through March
31. About 225 day-hiking spaces are available each day. You can
request up to six people and list multiple dates or a range of dates.
Results come out in April. (NPS)
It costs $10 to submit an application, regardless of
group size.
If you win, there is an additional $10 recreation fee per
person.
So a successful permit for four people ultimately costs:
$10 lottery application
$40 in per-person permit fees
$50 total
Should You Apply for Six People?
This is worth thinking about.
Six is the maximum group size, and if six people might realistically
go, asking for six gives you flexibility.
But it can also reduce your chances of winning.
Your lottery application has to be accommodated for the
entire group size you requested. If four spaces are
available but you’ve requested six, your application can’t fit those
four spaces.
So I wouldn’t automatically request six just because you’re allowed
to.
Ask for the number you’re actually likely to need.
If you win for six and later only four people can go, you can reduce
the size of the permit. What you cannot do is win for four and later
increase it to six.
Also designate an alternate permit holder when applying if possible.
Either the permit holder or the alternate has to be physically present
with the group when permits are checked. (NPS)
2. Try the Daily Lottery
If you lose in March, you get another opportunity just before the
hike.
The daily lottery happens two days before your desired hiking
date.
For example, if you want to hike Saturday, you enter on Thursday.
Applications are accepted until 4 p.m. Pacific, with results later that evening. I got my results each day at about 5 p.m. (NPS)
It costs another $10 each time you enter.
And that $10 is an application fee, not a deposit. You don’t get it
back when you lose.
This is where things started adding up for me.
We knew we would be visiting Yosemite in August, so I entered the
preseason lottery.
$10. No permit.
Once we arrived in Yosemite, I started entering the daily lottery for
days that would work.
Another $10. No permit.
Then another.
Still nothing.
You can spend a surprising amount of money losing a $10 lottery.
3. Get Half Dome Access With a Wilderness Permit
Another option is to backpack.
A Yosemite wilderness permit beginning at certain eligible trailheads
allows you to add Half Dome access to your wilderness permit for an
additional fee.
Eligible routes include Happy Isles to Little Yosemite Valley, Happy
Isles past Little Yosemite Valley, Glacier Point to Little Yosemite
Valley, Sunrise Lakes, Cathedral Lakes, and several others. (NPS
wilderness permits)
These are real backpacking permits. You can’t reserve a wilderness
permit and use it simply as a workaround for a Half Dome day hike.
Interestingly, this is fairly close to how I first experienced Half
Dome in the late 1980s. We backpacked up, slept below Sub Dome, and
climbed early the following morning.
Except back then there was no additional Half Dome permit to worry
about.
What About a Guided Half Dome Trip?
There is one more legitimate option: an authorized commercial
guide.
Commercial guide companies can obtain Half Dome permits for their
trips through a separate commercial allocation. Commercial operators
have to obtain their Half Dome spaces through the preseason lottery and
aren’t allowed to use the daily lottery. (NPS
commercial use rules)
For example, Sports Basement offers guided Half Dome backpacking
trips and advertises dates for which the permits have already been
secured.
This isn’t necessarily a cheap way to avoid the lottery. You’re
buying a guided trip, often a multi-day backpacking experience, rather
than simply purchasing a Half Dome permit.
But if climbing Half Dome is important enough to you and you don’t
mind paying for a guided trip, it’s another option.
What If You Lose Every Lottery?
This is what happened to us.
We were down to our last full day in Yosemite.
No preseason permit.
No daily lottery permit.
There were three of us who wanted to climb Half Dome.
We decided to hike anyway.
Our theory was pretty simple.
Half Dome permits are issued for a group size, while
the permit holder—or designated alternate—is the person whose identity
matters at the checkpoint.
What if someone had a permit for six but only four people showed
up?
There would be unused spaces.
We figured we’d ask.
Worst case, we’d still get a fantastic hike past Vernal Fall and
Nevada Fall toward Half Dome. If we hadn’t found anyone by the time we
reached the permit checkpoint, we’d turn around.
Start Talking to People
We started hiking at about 5:30 a.m. from the
parking lot near Upper Pines.
Once we passed Vernal Fall, I started asking people.
The first group was two guys.
They didn’t have Half Dome permits either. Instead, they were heading
toward Clouds Rest, which is a pretty good Plan B if
Half Dome doesn’t work out.
We continued.
Just before Nevada Fall, I approached another group—three men—and
asked if they had a Half Dome permit.
They did.
Actually, they had two.
All three of them had independently entered the daily lottery
requesting permits for three people.
Two of the three had won.
That meant three hikers were holding enough permit capacity for six
people.
They had exactly three extra spaces.
We needed exactly three.
I asked if we could join their group when we reached the Half Dome
checkpoint.
They said yes.
We were so excited.
After losing lottery after lottery, the entire problem was solved by
talking to a group of strangers below Nevada Fall.
Yes, Rangers Really Do Check Half Dome Permits
One of the questions I’d had beforehand was whether anyone actually
checked these permits.
On our August 2026 hike, the answer was an emphatic
yes.
When we arrived, a ranger was positioned at the top of Sub
Dome, immediately before the cables.
He asked the permit holder for ID and then looked up his name on a
tablet.
Interestingly, he didn’t ask to see the actual permit.
The important thing was the permit holder’s identity.
Our new friends had valid permits with enough capacity for everyone,
so the six of us continued to the cables.
Later, when we descended, the ranger had moved.
He was now stationed at the bottom of Sub Dome,
checking hikers before they started up.
So I absolutely would not make a plan based on getting there when a
ranger isn’t around.
Yosemite says the permit holder or alternate must be present with the
group when permits are checked, and rangers may ask for photo
identification. (NPS Half
Dome permits)
Can You Really Join Someone Else’s Half Dome Permit?
There is an important distinction here.
You can’t buy someone’s Half Dome permit from
them.
The permit holder can’t simply hand you the permit and stay
behind.
The actual permit holder—or designated alternate—must be present.
But the permit is also issued for a specific number of people.
If someone is permitted for a group larger than the group they’ve
actually brought, additional hikers can join them as long as the total
group doesn’t exceed the number authorized by the permit.
That’s what happened to us.
Three guys had enough permit capacity for six.
The six of us reached the checkpoint together.
The permit holder showed his ID.
And we were good to go.
Obviously, there is no guarantee you’ll find somebody with
extra space.
I wouldn’t hike 9 miles into the mountains assuming it will
happen.
But if you’re willing to hike knowing that Sub Dome might be your
turnaround point, asking other hikers is a perfectly reasonable last
option.
And don’t wait until you reach the ranger.
Start talking to people earlier on the trail.
You might make some new friends.
Our Half Dome Hike
The official Half Dome numbers didn’t quite match our day.
NPS describes the hike from Happy Isles as approximately
14–16 miles with 4,800 feet of climbing and says most
hikers take around 10–12 hours. (NPS)
Here’s what our GPS recorded:
Our hike
Distance
18.29 miles
Elevation gain
6,589 feet
Moving time
7:51:55
Elapsed time
11:02:28
Start
~5:30 a.m.
Our total elapsed time ended up almost exactly in NPS’s 10–12 hour
estimate, even though our recorded distance and climbing were
considerably higher.
There is no visitor parking directly at Happy Isles. NPS identifies
Trailhead Parking just beyond Curry Village,
approximately half a mile from Happy Isles. Curry Village parking is
about three-quarters of a mile away. (NPS)
We parked in the trailhead parking area near Upper Pines and started
walking at about 5:30 a.m.
That’s early enough that the Yosemite shuttle isn’t useful. Shuttle
service doesn’t begin until 7 a.m., so early Half Dome hikers should
plan to walk from the parking area to Happy Isles. (NPS)
Water: Bring a Filter
The National Park Service recommends at least one gallon, or
about 4 liters, of water per person for a Half Dome hike. (NPS)
That’s a good number to keep in mind.
But I think there is an important distinction between:
having access to four liters of water
and
carrying four liters from the parking lot.
Four liters of water weighs almost nine pounds.
Each of us started with 3 liters, and—just as
importantly—we carried a water filter.
The only treated drinking water along the trail is at the
Vernal Fall Footbridge, and that drinking fountain is
seasonal.
After that, the Merced River provides water up through Little
Yosemite Valley. NPS specifically says river water should be treated by
boiling, iodine, or a Giardia-rated water filter. (NPS water
guidance)
On the way back, we stopped at the Merced River near the
Little Yosemite Valley Campground and filtered more
water.
NPS confirms that the campground itself has no potable water; the
nearby Merced River is its water source, and the water needs to be
treated. (NPS
Little Yosemite Valley)
For me, this makes a filter one of the most useful pieces of
equipment you can carry on Half Dome.
I would rather:
Start with around 3 liters
Carry a lightweight filter
Refill from the Merced when necessary
than start the hike carrying four or five liters of water.
Just remember that the Merced near Little Yosemite Valley is
essentially your last dependable water source before Half
Dome. There isn’t water waiting for you at Sub Dome or the
summit.
Make sure you leave the river with enough to climb Half Dome and get
back.
Bring Food
This is an all-day hike.
We each packed a lunch plus trail snacks, and I
would definitely do that again.
For a hike that can easily take 10–12 hours, I want actual food
rather than trying to survive on a couple of energy bars.
Just keep your food under control. Yosemite requires hikers to keep
food within arm’s reach because bears, squirrels, chipmunks, and
Steller’s jays are all quite capable of helping themselves to an
unattended pack. (NPS)
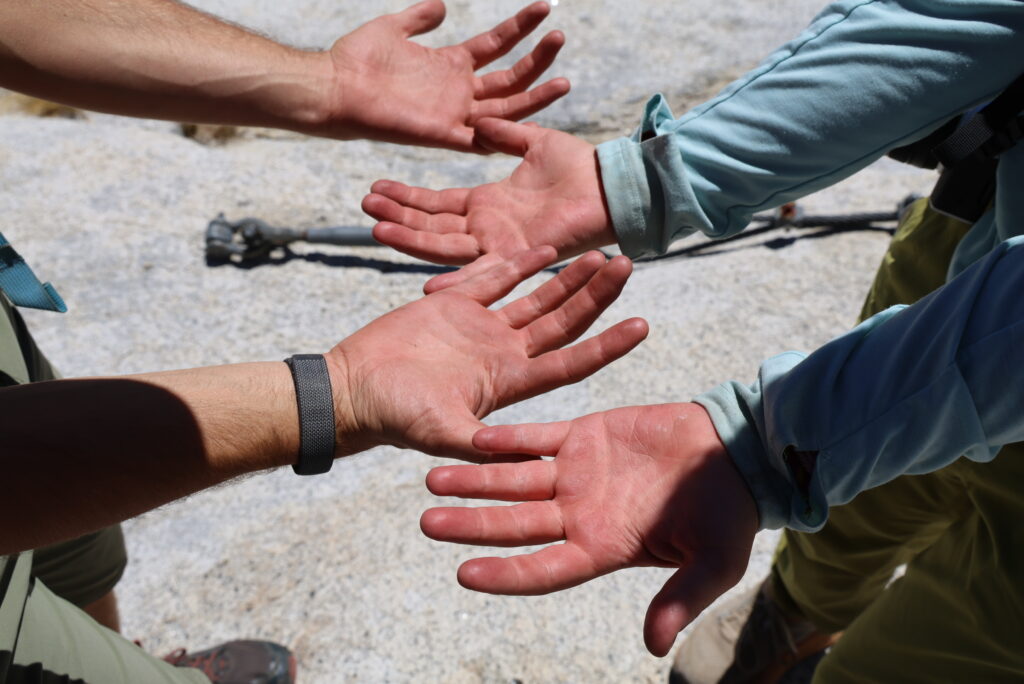
Gloves: Bring Your Own
This was one thing we got wrong.
We didn’t bring gloves.
I’d climbed Half Dome in previous years when there was a large pile
of abandoned gloves sitting at the bottom of the cables. We figured
there would probably be some there again.
There weren’t.
In hindsight, that’s probably a good thing.
NPS has been telling hikers for years to pack out their
gloves, noting that hundreds of pounds of abandoned, rotting
gloves have accumulated at Half Dome. (NPS)
So don’t count on the old glove pile.
We climbed without them and it was fine, but gloves would
have been nice.
The cables are steel, you’re gripping them hard, and you’re doing it
for a sustained period both going up and coming down.
NPS recommends sturdy gloves with good grip. (NPS)
I’d bring a pair next time.
And I’d bring them back down with me.
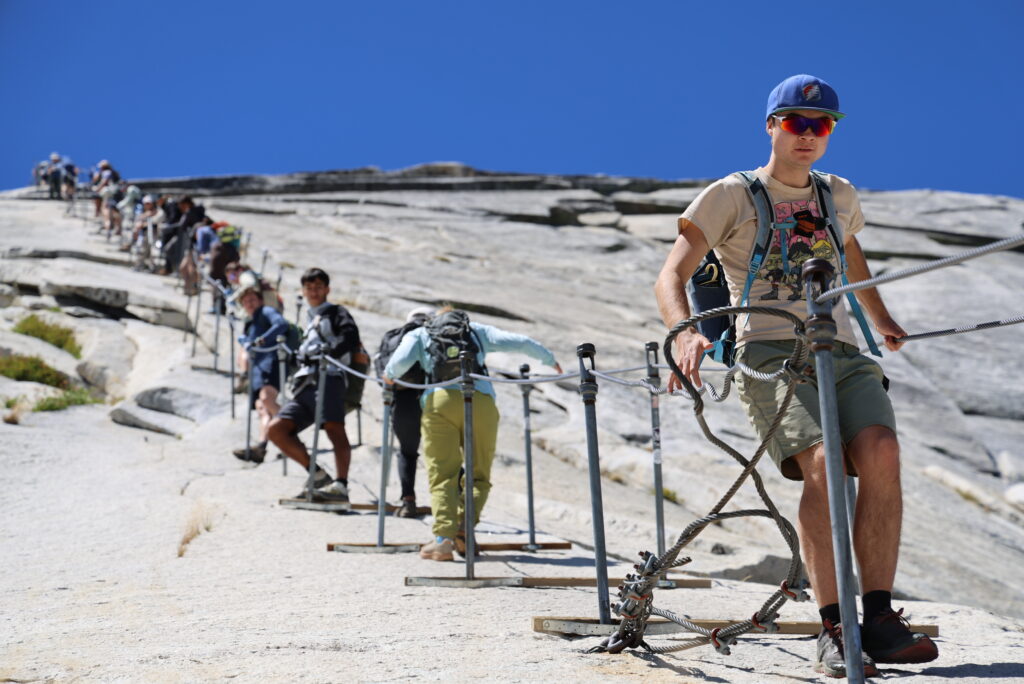
Do You Need to Clip Into the Cables?
We saw quite a few people using harnesses or devices that allowed
them to clip themselves onto the cables.
Personally, I wouldn’t bother when the cables are
installed for the season.
The Half Dome cable route was specifically designed so hikers can
ascend the final 400 feet without rock-climbing
equipment. (NPS)
The cable isn’t one uninterrupted line. It’s supported by a series of
posts, so someone using a clip-in system has to repeatedly stop, unclip,
move past a support, and clip back in.
On a busy day, we found that people doing this tended to slow down
the flow of hikers on the cables.
I understand why people do it. The exposure is intimidating, and
being physically attached to something can feel safer.
But I don’t consider a harness or clip-in device necessary for hiking
Half Dome with the cables up.
What mattered much more to me was:
Good shoes with traction
Keeping a solid grip on the cables
Taking advantage of the wooden boards for rests
Staying patient
Giving other hikers space
Not going up if the rock is wet
NPS’s own cable advice is similarly simple: take your time, be
patient with slower hikers, allow faster hikers to pass when possible,
and stay inside the cables. (NPS)
If you personally feel that you need a harness to be comfortable,
that’s a different calculation. But don’t assume that clipping into the
cables is standard equipment for Half Dome.
Most importantly, don’t let any piece of safety equipment convince
you to climb in conditions you otherwise wouldn’t.
Do Not Climb Wet Cables
Weather deserves its own section because Half Dome is not a place to
push your luck.
NPS says the leading cause of fatal falls on the Half Dome
cable route is being on the cables when the rock and/or cables are
wet. (NPS)
Thunderstorms create an additional problem. Half Dome’s summit is
extremely exposed, and holding onto steel cables during a lightning
storm is obviously not where you want to be.
Check the weather before leaving.
Keep checking the sky while you hike.
And if the granite is wet or storm clouds are approaching, turn
around.
You can try Half Dome again.
Bring a Headlamp
Even if you’re starting at 5:30 a.m. and expect to finish well before
dark, bring a headlamp.
Our hike took 11 hours elapsed.
A slower group, a long summit stop, congestion at the cables, a minor
injury, or simply enjoying yourself along the way can easily add several
hours.
NPS specifically recommends that every member of a Half Dome group
carry a flashlight or headlamp. (NPS)
A phone flashlight isn’t what I’d want to depend on several miles
from the trailhead.
Would I Hike Half Dome Without My Own Permit Again?
Yes.
But with an important qualification.
I would not hike Half Dome expecting to sneak past
the permit checkpoint.
I’d hike knowing there was a real possibility I wouldn’t get beyond
Sub Dome.
You can still have a fantastic day. Vernal Fall, Nevada Fall, Little
Yosemite Valley, and the back side of Half Dome are all worth
seeing.
And if you’re reasonably fit and willing to take the chance, I’d
start talking to people.
Ask:
“Do you happen to have any extra spaces on your Half Dome
permit?”
You don’t need somebody to give you their permit.
You need a permit holder who is already hiking Half Dome and has
unused capacity in their permitted group.
That distinction made all the difference for us.
Nearly forty years after climbing Half Dome with my dad and
cousin—when we woke up below Sub Dome and had Half Dome practically to
ourselves—I climbed it again under a very different system.
This time it took a preseason lottery, multiple daily lottery
attempts, several $10 fees, an 18-mile day, and three strangers we
happened to meet below Nevada Fall.
I still preferred the permit system from the 1980s.
But making three new friends on the way up wasn’t a bad consolation
prize.
WebPDF 3.0 is now available for free. This is a major update to one of my oldest apps.
I originally built WebPDF in 2014 for my kids’ elementary school. The school needed a simple way for parents to save emergency contact information from its website to their phones. At the time, there was no easy way to turn a webpage into something durable and easy to keep offline, so I quickly put together WebPDF.
Since then, the app has continued to evolve. What started as a small utility for saving a webpage as a PDF is now a much more capable tool for keeping important web information available when you need it.
With WebPDF 3.0, you can save webpages directly from the app or send them to WebPDF from Safari and other apps using the Share Sheet. You can choose between full-page and reader-friendly captures, and control paper size, orientation, margins, and background options before saving.
The PDF library has also been completely redesigned. You can search saved documents by title or PDF text, organize them into folders, switch between list and thumbnail views, rename files, merge PDFs, edit page order, remove pages, and share documents with other apps.
WebPDF also includes a built-in browser with bookmarks, history, find-in-page, and an option to open the current page in Safari.
Existing documents are brought forward when updating, so longtime users can keep their saved pages while gaining the new library and capture options.
WebPDF 3.0 is a much bigger update than the original app, but the purpose is still the same: make it easy to save useful information from the web and keep it with you.
One of the first things I noticed in Ulaanbaatar was the number of Toyota Priuses.
They were everywhere: parked along side streets, inching through traffic, working as taxis, and heading out of the city. Mostly second- and third-generation models, they seemed almost as common as the pickup trucks and rugged four-wheel-drive vehicles I had expected to see.
A low-slung Japanese hybrid might seem like an unlikely national car for a country known for bitter winters, rough roads, and enormous distances. But the more I learned—and the farther we traveled—the more Mongolia’s affection for the Prius made sense.
Almost half of recent imports
The numbers are remarkable.
Between January 1 and March 25, 2024, Toyota Priuses imported from Japan accounted for 47 percent of the vehicles Mongolia imported.
In April 2026, CNA reported that, according to Mongolia’s Ministry of Road and Transport Development, hybrids represented about 45 percent of the country’s roughly 1.5 million vehicles. The vast majority of those hybrids were Priuses.
This is not simply a case of one model selling particularly well. Mongolia has built an entire automotive ecosystem around the Prius.
Why Japan sells so many used cars
It is sometimes said that cars in Japan must be taken off the road after a certain number of years. That is not quite true.
Japan does not impose a maximum age on cars. Owners can keep a vehicle indefinitely as long as it remains registered, properly maintained, and able to pass the country’s vehicle-inspection system, known as shaken.
A new private passenger car receives an inspection certificate valid for three years. After that, it must be renewed every two years. Renewal involves the inspection itself, compulsory insurance, weight tax, and any maintenance or repairs required for the car to pass.
The inspection does not automatically condemn an older car. The issue is economic. As a car ages, its resale value falls while the cost of keeping it registered can rise. An OECD report found that Japanese ownership costs for conventional vehicles increase after 13 years, with higher road and inspection-related charges intended partly to encourage the adoption of newer, more efficient cars.
At some point, an owner may be facing a new round of inspection fees and repairs on a car worth relatively little in Japan. Replacing it often makes more financial sense than keeping it.
That does not mean the car has reached the end of its useful life. It has simply reached the end of its economically attractive life in Japan.
Japan consequently has an enormous used-car export industry. In 2025, it exported approximately 1.49 million used passenger vehicles to countries around the world. Mongolia receives only a portion of them, but it has become an especially important destination for used Priuses.
From a Japanese auction to Mongolia
Many of Mongolia’s Priuses are purchased through Japan’s large vehicle-auction system.
A World Bank-supported study of transportation in Mongolia describes a surprisingly complicated journey. Importers buy cars at physical or online auctions in Japan. Logistics companies move them to a Japanese seaport, where they are loaded into shipping containers—often four or five cars at a time.
The containers travel by sea to Tianjin, China. After being processed there, they continue by rail to the Mongolian border at Zamiin-Uud and eventually make their way to Ulaanbaatar and dealers around the country.
The Prius trade is large enough to include mass wholesalers importing thousands of cars per year. By the time one appears for sale in Mongolia, it may have passed through a Japanese auction house, a port, a container ship, Chinese customs, and a transcontinental railway journey.
Why the economics work in Mongolia
Fuel economy is a major part of the appeal.
Fuel costs are a major part of the appeal, and Ulaanbaatar traffic provides exactly the kind of slow, stop-and-go driving in which a hybrid works well. A recent study of electric mobility in Mongolia estimated fuel consumption of about 5.7 liters per 100 kilometers for a Prius 20-series—the second-generation model—compared with approximately 11 liters for the conventional Toyota Corolla used in the same comparison.
For years, Mongolia’s tax policies also favored hybrids over comparable gasoline-powered cars. Although some of the original exemptions have since been reduced, importing a small-engine hybrid remains relatively attractive.
The cars themselves are inexpensive because they arrive used. And because there are so many Priuses in Mongolia, parts are widely available and mechanics have become highly experienced at repairing them—including diagnosing and rebuilding their aging battery packs.
That creates a cycle: a common car is easier and cheaper to repair, which makes it more attractive to the next buyer, which puts even more of them on the road.
Adapted for Mongolian roads
A surprising number of the Priuses we saw appeared to have been modified for Mongolia.
Many sat noticeably higher than a stock Prius. Others had larger or more aggressive-looking tires, presumably to gain a little more ground clearance and traction on dirt roads. Some carried roof racks, spare tires, or other equipment that would have looked more natural on an SUV.
I couldn’t find any statistics showing how many Mongolian Priuses are modified, but it was common enough to be noticeable.
Lifting one of the second- or third-generation Priuses common in Mongolia does not turn it into a four-wheel-drive vehicle. Those models remain front-wheel-drive cars with limited suspension travel and vulnerable components underneath. Larger tires and extra ground clearance can nevertheless make them more practical on rutted roads, where the biggest problem may be avoiding rocks or keeping the center of the road from scraping the bottom of the car.
Owners seem to adapt the Prius just enough to make it work.
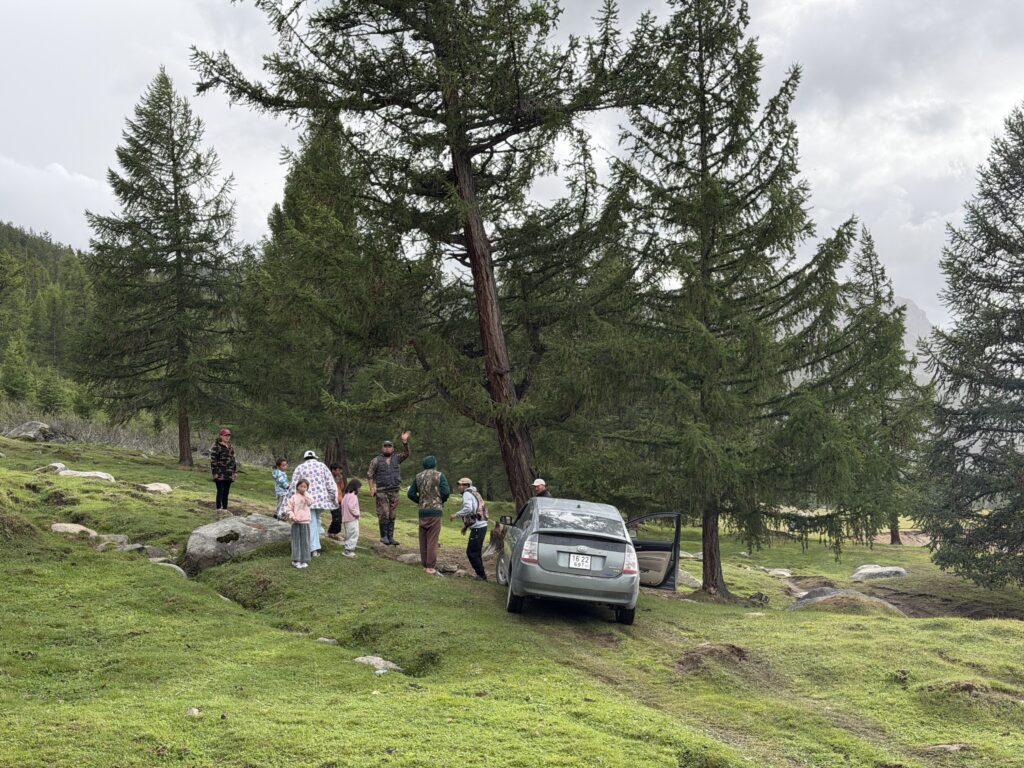
The Prius that joined a four-wheel-drive caravan
One day while we were camping, a large caravan of vehicles came through. Nearly all of them were four-wheel drives—the kind of vehicles you would expect to see traveling through that terrain.
But there was also a Prius.
The route included a steep, technical section covered in large rocks. Even the four-wheel-drive vehicles had a difficult time getting through it. Then it was the Prius’s turn.
It obviously could not make the climb on its first attempt. But the driver kept trying.
For close to 30 minutes, the Prius attempted different lines up the rocky section. It would move forward, lose traction or run out of clearance, and try again. Eventually, all of us walked over to help.
With a group of people pushing—and presumably with the driver wondering whether bringing a Prius had been a good idea—we managed to get it up and over the rocks.
The remarkable part was not that the Prius struggled. The obstacle had challenged actual four-wheel-drive vehicles. The remarkable part was that the Prius was there at all—and that its driver fully expected it to try.
By that point in the trip, perhaps we should not have been surprised. In Mongolia, a Prius is apparently allowed to join the caravan.
More capable than it looks
The Prius was designed as an efficient city car, not an off-road vehicle. Mongolia does not appear to have received that message.
Priuses can be found far beyond Ulaanbaatar, traveling roads that would make many owners elsewhere turn around. They are not substitutes for the Land Cruisers, Russian vans, and other four-wheel-drive vehicles used for the most difficult terrain.
But the Prius is cheap enough, efficient enough, and apparently tough enough to go much farther than its designers probably imagined.
Its popularity also gives owners a certain freedom to experiment. If parts and knowledgeable mechanics are available almost everywhere, taking an old Prius down a rough road becomes less intimidating than doing the same thing in a rare or expensive vehicle.
Under the current policy, green plates are reserved for battery-electric vehicles and range-extended electric vehicles. An ordinary Prius is a gasoline-electric hybrid, not a battery-electric vehicle, and does not qualify. Plug-in hybrids are also excluded and continue to receive regular white plates.
With so many Priuses on the road, a green plate is a useful distinction. It identifies a vehicle in Mongolia’s electric category, not simply one of its hundreds of thousands of hybrids.
The battery problem
The Prius boom also has a downside.
Many cars arrive in Mongolia after years of use in Japan. Some are sold after their original battery warranty or service coverage has expired, when replacing a complete battery pack would be difficult to justify in the Japanese market.
Mongolia’s repair industry has become remarkably resourceful. Mechanics open the nickel-metal-hydride battery packs, test their individual modules, and replace the ones that have failed. Usable modules from several old batteries can be combined to keep another Prius on the road.
Eventually, however, the modules can no longer be reused.
My daughter had heard that there was a large warehouse full of discarded Prius batteries in Ulaanbaatar. A recent investigation suggests that story was substantially true—although “warehouse” may be too formal a word for it.
In April 2026, CNA visited an anonymous vehicle-repair garage on the outskirts of the city that had become an unofficial center of Mongolia’s depleted Prius-battery network. The owner, whose name was withheld, claimed that he collected nearly every dead Prius battery from Ulaanbaatar and beyond.
At the time of CNA’s visit, the owner said he was storing approximately 50,000 depleted Prius battery packs, reportedly accumulated since the beginning of 2025.
The number is the owner’s estimate rather than a verified government count. But researchers have independently documented an informal network of collection points around Ulaanbaatar where end-of-life automotive batteries are bought and stored. There are no national standards governing how hybrid batteries should be inspected, stored, or processed.
The garage owner had previously collected batteries for export and recycling in Japan. According to CNA, that route became blocked in early 2025 by new legal restrictions and rules preventing hazardous material from being transported through Mongolia’s neighboring countries. The batteries continued arriving, but they could no longer leave.
Mongolia opened its first dedicated lead-acid battery recycling plant in 2024. That is useful for the conventional 12-volt batteries found in nearly every car, but the plant cannot process the high-voltage nickel-metal-hydride packs used by older Priuses. Those require different equipment and procedures.
The reported stockpile is therefore not a recycling facility. It is the physical result of a system with a way to import hybrid cars, repair their batteries, and collect the depleted parts—but no completed final step.
The Prius helped make fuel-efficient transportation affordable in Mongolia. But when Japan exports the useful second life of a hybrid car, responsibility for the end of that life travels with it. Mongolia receives both the car and the battery that will eventually need somewhere to go.
Mongolia’s unofficial national car
Before visiting Mongolia, I associated the Prius with commuting, paved streets, and carefully calculated fuel economy.
Now I also associate it with Ulaanbaatar traffic, Japanese auction stickers, raised suspensions, oversized tires, dusty tracks—and a group of people pushing one over rocks while a convoy of four-wheel-drive vehicles waited.
The Toyota Prius may not be Mongolia’s official national car. But judging by the roads, it has a convincing claim to the title.
SwiftTip 1.5 is now available on the App Store for free.
What’s new in SwiftTip 1.5
Customize up to seven quick tip percentages, or enter any custom tip from 0% to 100%.
Choose Exact, Round Tip, or Round Total with clearer controls.
Split bills between up to 20 people while keeping the full tip and total visible.
See refreshed themes, stronger contrast, and a redesigned Settings experience.
Use improved support for larger text and VoiceOver, along with more reliable currency calculations.
I originally created SwiftTip in 2015 for two reasons—and both are in its name.
First, I wanted a quick, free way to calculate a tip. Most tip calculators felt clunky and slow, so I built one designed for just a few taps and swipes. The goal was to calculate a tip swiftly and get back to your meal.
Second, SwiftTip was one of my first chances to build something with Apple’s new Swift programming language. It was a practical way to learn the language while making an app I would actually use.
Over the years, SwiftTip has remained both a useful utility and a small experiment. I’ve updated it to try new Apple APIs, Swift language features, operating-system capabilities, and evolving iOS design patterns.
This release continues that dual purpose: a modern, fast tip calculator—and a chance to keep exploring what’s new in Swift and iOS.
Me 3.1 is now available for free. This release makes it easier to keep your contact details close at hand—and more importantly, to share the right version of them with the right person.
What’s new in Me 3.1
Saved sharing profiles let you create reusable choices such as Personal, Work, or Networking.
QR contact cards let anyone scan your selected details, including people using Android.
Send to Myself adds a Share Sheet extension for quickly moving files into a new email to yourself.
Widgets, Siri, and Shortcuts put your preferred contact details one tap—or one voice request—away.
A refreshed sharing flow, onboarding experience, and new app icon round out the update.
A small app with a long history
I first created Me in 2009. At the time, its purpose was simple: I wanted a fast way to pull up my own contact information whenever I needed it. No digging through Contacts to find my phone number, email address, or mailing address.
Over time, Me became more useful as a way to share my contact information. My contact card has a lot of data, and I do not always want to give all of it to every person I meet. Me made it possible to share only the specific fields I wanted: perhaps a work email address and phone number, but not a home address or other personal details.
Apple has since brought selective contact sharing into iOS, which is genuinely useful. In a sense, Apple “Sherlocked” one of Me’s best features. But sharing is still contextual, and Me 3.1 improves on that idea with saved sharing profiles. I can now set up a Personal profile, a Work profile, or any other combination of contact details, then choose the appropriate one without rebuilding the selection each time.
Beyond AirDrop
AirDrop is a great way to share a contact between Apple devices, but it does not help when the person standing in front of you uses Android. Me 3.1 adds QR contact cards so you can share your selected details with anyone who has a QR code reader. They scan the code, add the contact, and you stay in control of what was included.
The underlying idea has not changed since 2009: your contact information should be easy to reach and easy to share. Me 3.1 simply gives that idea more useful, more private, and more flexible ways to work.
One of the small things I started noticing while traveling around Mongolia was that vehicle license plates came in several different colors. Most were white, but we also passed cars and buses with yellow, dark blue, red, green, and black plates.
The colors are not decorative. In Mongolia, the background color tells you what kind of vehicle you are looking at—or who owns it.
The quick guide
Plate color
What it means
⚪ White
Regular vehicles
🟡 Yellow
Public passenger transportation, including buses and taxis
🔵 Dark blue
Vehicles owned by the national or local government
🔴 Red
Diplomatic vehicles
🟢 Green
Qualifying electric vehicles
⚫ Black
Specialized technological-purpose vehicles
White: regular vehicles
White plates with black characters are the standard plates seen on most cars, motorcycles, and trailers. Calling these “private” plates is close, but “regular” is more accurate: the category covers ordinary vehicles that do not belong to one of the special groups.
A typical plate contains four numbers followed by three Cyrillic letters. On the plates we saw, the first two letters identified the registration area. Several combinations—including УБ, УН, УА, УЕ, and УК—were used for Ulaanbaatar. БӨ identified Bayan-Ölgii, ХӨ Khövsgöl, and ӨМ Ömnögovi.
Modern plates also carry two small national identifiers: Mongolia’s red Soyombo symbol on the left and an oval MNG mark between the numbers and letters.
Yellow: buses and taxis
Yellow plates with black characters identify vehicles used for public passenger transportation. That includes city and intercity buses as well as licensed taxis.
The distinction is narrower than simply “commercial vehicle.” A business-owned car or an ordinary cargo truck does not automatically receive a yellow plate merely because it is used commercially.
Mongolia’s vehicle-registration rules even account for a vehicle entering or leaving public passenger service: it can keep the same number and letter sequence while exchanging the yellow plate for a regular one.
Dark blue: government-owned vehicles
Dark blue plates with white characters identify vehicles registered as property of the national or a local government.
Mongolia began changing these vehicles to dark blue plates in 2023. The stated idea was to make publicly owned vehicles easier for everyone to recognize, discourage their use for personal errands, and improve public oversight.
This makes the color more than an administrative classification. It lets anyone standing on a street see when a vehicle belongs to the government.
Red: diplomatic vehicles
Red plates with white characters belong to diplomatic missions and qualifying diplomatic personnel. These plates use the Cyrillic prefix ДК, followed by four numbers.
The first pair of numbers can identify the country or organization. For example, published lists have used 19 for the United States and 32 for the European Union.
Green: electric vehicles
Green plates with white characters identify qualifying electric vehicles.
This category was particularly timely during our trip. In May 2026, Mongolia’s Ministry of Road and Transport clarified that green plates would be issued to battery-electric vehicles and range-extended electric vehicles. Conventional hybrids and plug-in hybrids do not qualify under that policy. The ministry specifically named common Japanese imports such as the Toyota Prius and Aqua as vehicles that would not receive green plates merely for being hybrids.
Qualifying green-plate vehicles are also exempt from Ulaanbaatar’s license-plate-based driving restrictions, giving drivers another reason to choose an electric vehicle.
Black: technological-purpose vehicles
Black plates with white characters are used for specialized technological-purpose vehicles and machinery.
Some informal explanations describe every black Mongolian plate as military, but that is not accurate. Mongolia’s civilian plate standard assigns black to the technological category, while vehicles used by the armed forces, border troops, and internal troops are governed separately.
A small system hiding in plain sight
Before learning what the colors meant, I saw them as just another unfamiliar detail. Once I understood the system, traffic became a little more readable. A yellow plate was carrying passengers. A dark blue plate belonged to the government. A red one was connected to a diplomatic mission. A green one was in the qualifying electric-vehicle category—not just one of Ulaanbaatar’s many imported Priuses.
It is a simple visual language, and once you know it is there, you start reading it everywhere you go.
If you’ve been using DEVONthink Pro for a while, chances are you’ve accumulated thousands of documents with a naming convention you’d now like to change. I recently found myself in this exact situation, and DEVONthink’s built-in Batch Process tool saved me hours of manual renaming.
My Use Case: Switching to ISO Date Format
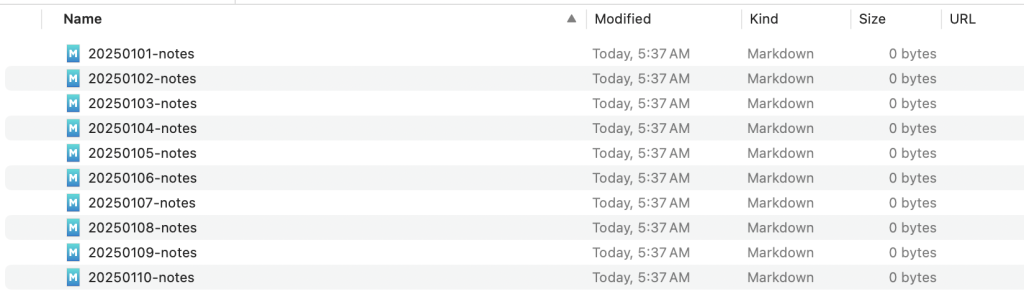
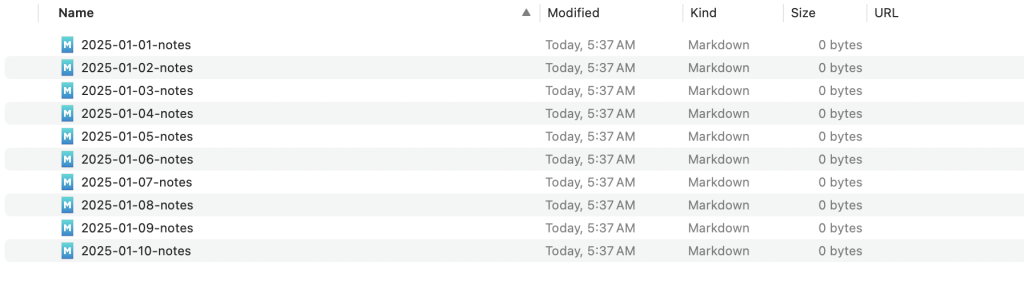
For years, I named all my notes and documents using the format YYYYMMdd-title, like 20250101-notes. It worked fine, but I eventually decided to switch to the ISO 8601 standard format: YYYY-MM-dd-title (e.g., 2025-01-01-notes). The hyphens between date components make it much easier to read at a glance.
The problem? I had thousands of documents in the old format.
Why Not Use Name Mangler?
On macOS, I typically use Name Mangler for batch renaming files in Finder. It’s a fantastic tool for filesystem operations. However, DEVONthink manages its own database, and renaming files through Finder doesn’t work the same way. I needed a solution that worked directly within DEVONthink.
Enter Batch Process.
What is Batch Process?
Batch Process is a powerful built-in tool in DEVONthink Pro that lets you apply a sequence of actions to multiple selected items. You can create reusable configurations for tasks you perform frequently, including renaming files using regular expressions.
Creating a Batch Process Configuration
Here’s how I set up a configuration to convert my date format:
Step 1: Select Files and Open Batch Process
Select one or more files in DEVONthink that you want to rename
From the menu, choose Tools > Batch Process > Batch Process…
Step 2: Create a New Configuration
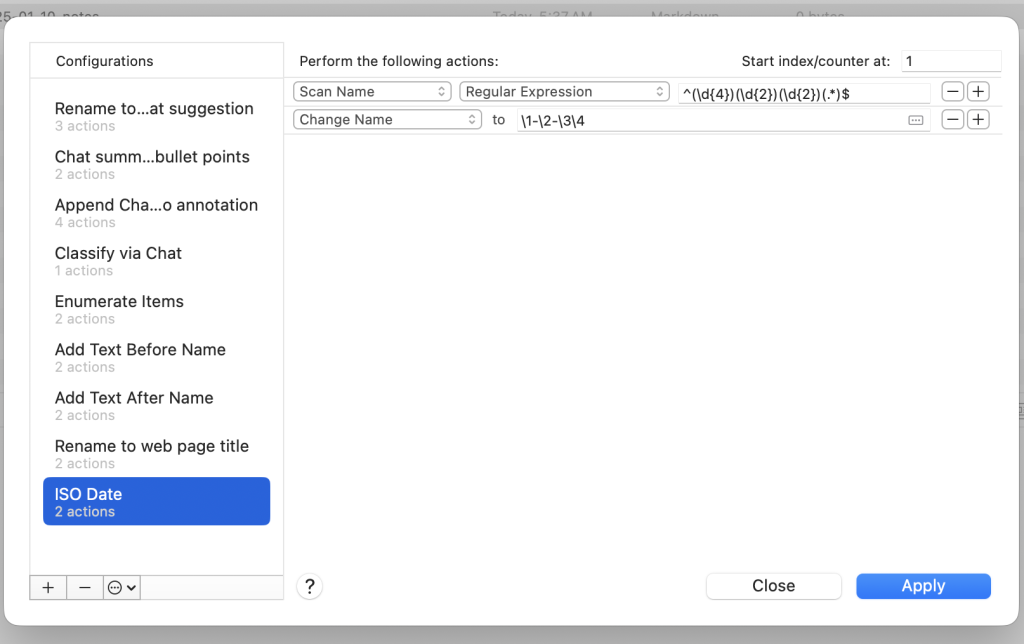
In the Batch Process dialog, click the + button at the bottom left to create a new configuration
Give it a descriptive name (I called mine “ISO Date”)
Step 3: Configure the Actions
You’ll need two actions to perform the rename:
Action 1 – Scan the filename: – Set the first dropdown to Scan Name – Set the second dropdown to Regular Expression – Enter the regex pattern: ^(\d{4})(\d{2})(\d{2})(.*)$
Action 2 – Change the filename: – Set the dropdown to Change Name – In the “to” field, enter: \1-\2-\3\4
Understanding the Regular Expression
Let me break down how this regex works:
Pattern
Meaning
^
Start of the filename
(\d{4})
Capture group 1: exactly 4 digits (year)
(\d{2})
Capture group 2: exactly 2 digits (month)
(\d{2})
Capture group 3: exactly 2 digits (day)
(.*)
Capture group 4: everything else (the title)
$
End of the filename
The replacement pattern \1-\2-\3\4 then reconstructs the filename: – \1 = the year (2025) – - = literal hyphen – \2 = the month (01) – - = literal hyphen – \3 = the day (01) – \4 = the rest of the filename (-notes)
So 20250101-notes becomes 2025-01-01-notes.
Running the Batch Process
Once your configuration is saved, using it is simple:
Step 1: Select Files to Rename
Select the files you want to convert. You can select multiple files, an entire folder’s contents, or use DEVONthink’s smart groups to find all files matching your old naming pattern.
Step 2: Apply the Configuration
From the menu, select Tools > Batch Process > ISO Date (or whatever you named your configuration).
DEVONthink will process all selected files instantly.
Tips for Using Batch Process
Test first: Always test your configuration on a few files before running it on your entire library
Use Smart Groups: Create a smart group that matches files with the old naming pattern to easily find all files that need conversion
Backup: While DEVONthink’s undo usually works, having a backup before major batch operations is always a good idea
Reuse configurations: Your configurations are saved and appear in the Tools > Batch Process menu for quick access
Conclusion
DEVONthink’s Batch Process tool is incredibly powerful for bulk operations. What would have taken hours of manual renaming was accomplished in seconds. If you’re managing a large document library and need to make systematic changes, Batch Process is worth learning.
The combination of regular expression matching and sequential actions makes it flexible enough to handle complex renaming scenarios while remaining accessible through a graphical interface.
I recently put together a Python script to sync my reading history between Book Tracker and Goodreads.
I use Book Tracker as my primary reading tracker. It’s a great app for cataloging books and tracking progress. But I also like to keep my Goodreads profile up to date. Books I read on my Kindle automatically show up in Goodreads, but audiobooks I listen to through Libby don’t. Since Goodreads doesn’t have a public API, the only way to sync is through CSV exports.
This script compares exports from both apps, figures out which books are missing from each, and generates properly formatted import files. It handles the tricky parts like matching different editions of the same book (which have different ISBNs) and normalizing titles that vary between platforms.