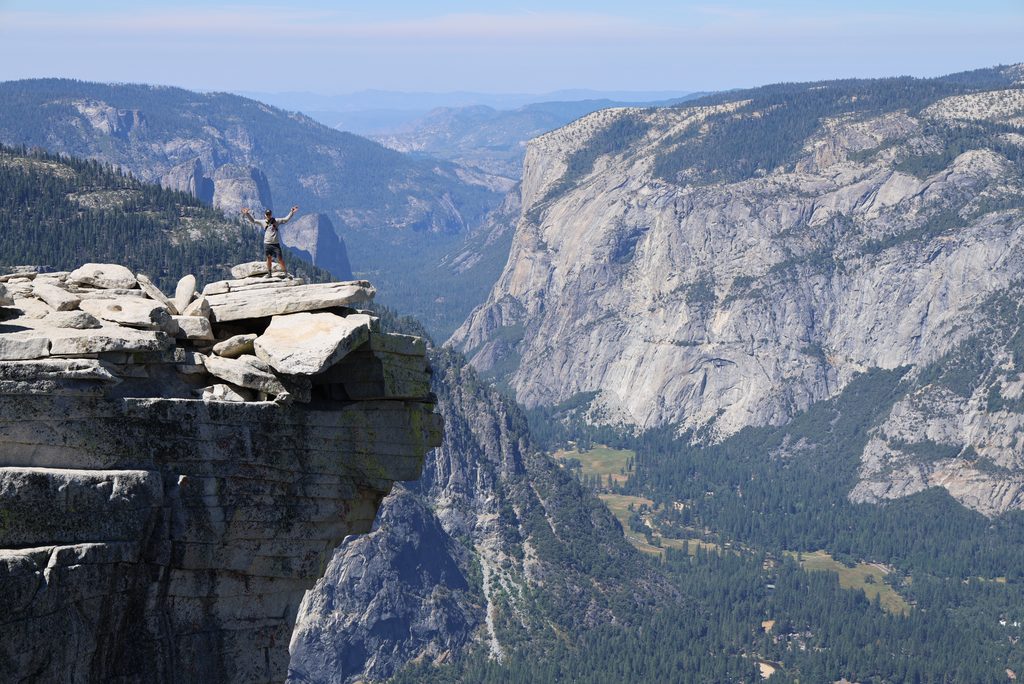
The first time I hiked Half Dome was sometime in the late 1980s. I went with my dad and my cousin. We backpacked up to the bottom of Sub Dome, spent the night, woke up early the next morning, and climbed to the summit.
We had Half Dome almost completely to ourselves.
There was no lottery. No Recreation.gov. No $10 application fee. No ranger checking IDs. You just hiked up and climbed the cables.
Things have changed.
Today, Half Dome is still one of Yosemite’s classic hikes, but getting permission to climb the final section can be one of the hardest parts of the trip.
The National Park Service describes the standard Half Dome hike from Happy Isles as about 14–16 miles round trip with 4,800 feet of elevation gain, typically taking 10–12 hours. (NPS)
Our 2026 hike ended up considerably longer:
- Distance: 18.29 miles
- Elevation gain: 6,589 feet
- Moving time: 7:51:55
- Elapsed time: 11:02:28
You can see our actual Half Dome hike on Strava.
If you want to follow the same general route, I also created a Half Dome route on Strava.
And when the cables are up, you need a permit to go beyond the base of Sub Dome. Yosemite allows about 300 hikers per day: approximately 225 day hikers and 75 backpackers. (NPS Half Dome permits)
In August 2026, I learned just how frustrating that permit system can be.
I lost the preseason lottery.
Then, while we were actually in Yosemite, I entered the daily lottery over and over again.
I lost every time.
On our last full day in Yosemite, we decided to hike anyway.
Not because we planned to sneak past the ranger.
We had another idea:
Maybe somebody else would have extra room on their permit.
It worked.
Half Dome Didn’t Always Require a Permit
Until 2010, there was no Half Dome day-hiking permit system.
That sounds almost strange now, but for decades anyone could hike to the cables and climb Half Dome.
The problem was that Half Dome became extremely popular.
Before permits, Saturdays and holidays were averaging around 840 people per day, and peak days saw roughly 1,100 to 1,200 people using the cables. Yosemite reported waits of an hour or more just to get onto them. (NPS 2010 permit announcement)
In response, Yosemite introduced an interim permit system in 2010.
At first, permits were required only on Fridays, Saturdays, Sundays, and federal holidays. Yosemite allowed 400 people per day: 300 day hikers and 100 backpackers. The permit itself was free, although Recreation.gov charged a $1.50 service fee per person. (NPS)
Contrary to what I had remembered, these weren’t initially walk-up permits. They were available on a first-come, first-served basis through Recreation.gov or by telephone.
In 2011, Yosemite expanded the permit requirement to seven days per week. (NPS)
Then, in 2012, Yosemite replaced the first-come, first-served system with a lottery. That included a preseason lottery and a second lottery held two days before each hiking date. (NPS)
That’s essentially the system we still have today.
| Year | Half Dome permit system |
|---|---|
| Before 2010 | No permit required |
| 2010 | First-come, first-served permits for weekends and holidays |
| 2011 | Permits required seven days a week |
| 2012 | Preseason and daily lotteries introduced |
| 2013 | Permit system adopted as the long-term management plan |
| 2026 | Preseason + two-day-ahead daily lotteries |
How to Get a Half Dome Permit in 2026
There are three primary ways to legally get access to Half Dome.
1. Win the Preseason Lottery
This is where I would start.
The preseason lottery runs from March 1 through March 31. About 225 day-hiking spaces are available each day. You can request up to six people and list multiple dates or a range of dates. Results come out in April. (NPS)
It costs $10 to submit an application, regardless of group size.
If you win, there is an additional $10 recreation fee per person.
So a successful permit for four people ultimately costs:
- $10 lottery application
- $40 in per-person permit fees
- $50 total
Should You Apply for Six People?
This is worth thinking about.
Six is the maximum group size, and if six people might realistically go, asking for six gives you flexibility.
But it can also reduce your chances of winning.
Your lottery application has to be accommodated for the entire group size you requested. If four spaces are available but you’ve requested six, your application can’t fit those four spaces.
So I wouldn’t automatically request six just because you’re allowed to.
Ask for the number you’re actually likely to need.
If you win for six and later only four people can go, you can reduce the size of the permit. What you cannot do is win for four and later increase it to six.
Also designate an alternate permit holder when applying if possible. Either the permit holder or the alternate has to be physically present with the group when permits are checked. (NPS)
2. Try the Daily Lottery
If you lose in March, you get another opportunity just before the hike.
The daily lottery happens two days before your desired hiking date.
For example, if you want to hike Saturday, you enter on Thursday.
Applications are accepted until 4 p.m. Pacific, with results later that evening. I got my results each day at about 5 p.m. (NPS)
It costs another $10 each time you enter.
And that $10 is an application fee, not a deposit. You don’t get it back when you lose.
This is where things started adding up for me.
We knew we would be visiting Yosemite in August, so I entered the preseason lottery.
$10. No permit.
Once we arrived in Yosemite, I started entering the daily lottery for days that would work.
Another $10. No permit.
Then another.
Still nothing.
You can spend a surprising amount of money losing a $10 lottery.
3. Get Half Dome Access With a Wilderness Permit
Another option is to backpack.
A Yosemite wilderness permit beginning at certain eligible trailheads allows you to add Half Dome access to your wilderness permit for an additional fee.
Eligible routes include Happy Isles to Little Yosemite Valley, Happy Isles past Little Yosemite Valley, Glacier Point to Little Yosemite Valley, Sunrise Lakes, Cathedral Lakes, and several others. (NPS wilderness permits)
These are real backpacking permits. You can’t reserve a wilderness permit and use it simply as a workaround for a Half Dome day hike.
Interestingly, this is fairly close to how I first experienced Half Dome in the late 1980s. We backpacked up, slept below Sub Dome, and climbed early the following morning.
Except back then there was no additional Half Dome permit to worry about.
What About a Guided Half Dome Trip?
There is one more legitimate option: an authorized commercial guide.
Commercial guide companies can obtain Half Dome permits for their trips through a separate commercial allocation. Commercial operators have to obtain their Half Dome spaces through the preseason lottery and aren’t allowed to use the daily lottery. (NPS commercial use rules)
For example, Sports Basement offers guided Half Dome backpacking trips and advertises dates for which the permits have already been secured.
This isn’t necessarily a cheap way to avoid the lottery. You’re buying a guided trip, often a multi-day backpacking experience, rather than simply purchasing a Half Dome permit.
But if climbing Half Dome is important enough to you and you don’t mind paying for a guided trip, it’s another option.
What If You Lose Every Lottery?
This is what happened to us.
We were down to our last full day in Yosemite.
No preseason permit.
No daily lottery permit.
There were three of us who wanted to climb Half Dome.
We decided to hike anyway.
Our theory was pretty simple.
Half Dome permits are issued for a group size, while the permit holder—or designated alternate—is the person whose identity matters at the checkpoint.
What if someone had a permit for six but only four people showed up?
There would be unused spaces.
We figured we’d ask.
Worst case, we’d still get a fantastic hike past Vernal Fall and Nevada Fall toward Half Dome. If we hadn’t found anyone by the time we reached the permit checkpoint, we’d turn around.
Start Talking to People
We started hiking at about 5:30 a.m. from the parking lot near Upper Pines.
Once we passed Vernal Fall, I started asking people.
The first group was two guys.
They didn’t have Half Dome permits either. Instead, they were heading toward Clouds Rest, which is a pretty good Plan B if Half Dome doesn’t work out.
We continued.
Just before Nevada Fall, I approached another group—three men—and asked if they had a Half Dome permit.
They did.
Actually, they had two.
All three of them had independently entered the daily lottery requesting permits for three people.
Two of the three had won.
That meant three hikers were holding enough permit capacity for six people.
They had exactly three extra spaces.
We needed exactly three.
I asked if we could join their group when we reached the Half Dome checkpoint.
They said yes.
We were so excited.
After losing lottery after lottery, the entire problem was solved by talking to a group of strangers below Nevada Fall.
Yes, Rangers Really Do Check Half Dome Permits
One of the questions I’d had beforehand was whether anyone actually checked these permits.
On our August 2026 hike, the answer was an emphatic yes.
When we arrived, a ranger was positioned at the top of Sub Dome, immediately before the cables.
He asked the permit holder for ID and then looked up his name on a tablet.
Interestingly, he didn’t ask to see the actual permit.
The important thing was the permit holder’s identity.
Our new friends had valid permits with enough capacity for everyone, so the six of us continued to the cables.
Later, when we descended, the ranger had moved.
He was now stationed at the bottom of Sub Dome, checking hikers before they started up.
So I absolutely would not make a plan based on getting there when a ranger isn’t around.
Yosemite says the permit holder or alternate must be present with the group when permits are checked, and rangers may ask for photo identification. (NPS Half Dome permits)
Can You Really Join Someone Else’s Half Dome Permit?
There is an important distinction here.
You can’t buy someone’s Half Dome permit from them.
The permit holder can’t simply hand you the permit and stay behind.
The actual permit holder—or designated alternate—must be present.
But the permit is also issued for a specific number of people.
If someone is permitted for a group larger than the group they’ve actually brought, additional hikers can join them as long as the total group doesn’t exceed the number authorized by the permit.
That’s what happened to us.
Three guys had enough permit capacity for six.
The six of us reached the checkpoint together.
The permit holder showed his ID.
And we were good to go.
Obviously, there is no guarantee you’ll find somebody with extra space.
I wouldn’t hike 9 miles into the mountains assuming it will happen.
But if you’re willing to hike knowing that Sub Dome might be your turnaround point, asking other hikers is a perfectly reasonable last option.
And don’t wait until you reach the ranger.
Start talking to people earlier on the trail.
You might make some new friends.
Our Half Dome Hike
The official Half Dome numbers didn’t quite match our day.
NPS describes the hike from Happy Isles as approximately 14–16 miles with 4,800 feet of climbing and says most hikers take around 10–12 hours. (NPS)
Here’s what our GPS recorded:
| Our hike | |
|---|---|
| Distance | 18.29 miles |
| Elevation gain | 6,589 feet |
| Moving time | 7:51:55 |
| Elapsed time | 11:02:28 |
| Start | ~5:30 a.m. |
Our total elapsed time ended up almost exactly in NPS’s 10–12 hour estimate, even though our recorded distance and climbing were considerably higher.
Here’s the complete activity on Strava.
Where to Park
Most Half Dome day hikers start from Happy Isles.
There is no visitor parking directly at Happy Isles. NPS identifies Trailhead Parking just beyond Curry Village, approximately half a mile from Happy Isles. Curry Village parking is about three-quarters of a mile away. (NPS)
We parked in the trailhead parking area near Upper Pines and started walking at about 5:30 a.m.
That’s early enough that the Yosemite shuttle isn’t useful. Shuttle service doesn’t begin until 7 a.m., so early Half Dome hikers should plan to walk from the parking area to Happy Isles. (NPS)
Water: Bring a Filter
The National Park Service recommends at least one gallon, or about 4 liters, of water per person for a Half Dome hike. (NPS)
That’s a good number to keep in mind.
But I think there is an important distinction between:
having access to four liters of water
and
carrying four liters from the parking lot.
Four liters of water weighs almost nine pounds.
Each of us started with 3 liters, and—just as importantly—we carried a water filter.
The only treated drinking water along the trail is at the Vernal Fall Footbridge, and that drinking fountain is seasonal.
After that, the Merced River provides water up through Little Yosemite Valley. NPS specifically says river water should be treated by boiling, iodine, or a Giardia-rated water filter. (NPS water guidance)
On the way back, we stopped at the Merced River near the Little Yosemite Valley Campground and filtered more water.
NPS confirms that the campground itself has no potable water; the nearby Merced River is its water source, and the water needs to be treated. (NPS Little Yosemite Valley)
For me, this makes a filter one of the most useful pieces of equipment you can carry on Half Dome.
I would rather:
- Start with around 3 liters
- Carry a lightweight filter
- Refill from the Merced when necessary
than start the hike carrying four or five liters of water.
Just remember that the Merced near Little Yosemite Valley is essentially your last dependable water source before Half Dome. There isn’t water waiting for you at Sub Dome or the summit.
Make sure you leave the river with enough to climb Half Dome and get back.
Bring Food
This is an all-day hike.
We each packed a lunch plus trail snacks, and I would definitely do that again.
For a hike that can easily take 10–12 hours, I want actual food rather than trying to survive on a couple of energy bars.
Just keep your food under control. Yosemite requires hikers to keep food within arm’s reach because bears, squirrels, chipmunks, and Steller’s jays are all quite capable of helping themselves to an unattended pack. (NPS)
Gloves: Bring Your Own
This was one thing we got wrong.
We didn’t bring gloves.
I’d climbed Half Dome in previous years when there was a large pile of abandoned gloves sitting at the bottom of the cables. We figured there would probably be some there again.
There weren’t.
In hindsight, that’s probably a good thing.
NPS has been telling hikers for years to pack out their gloves, noting that hundreds of pounds of abandoned, rotting gloves have accumulated at Half Dome. (NPS)
So don’t count on the old glove pile.
We climbed without them and it was fine, but gloves would have been nice.
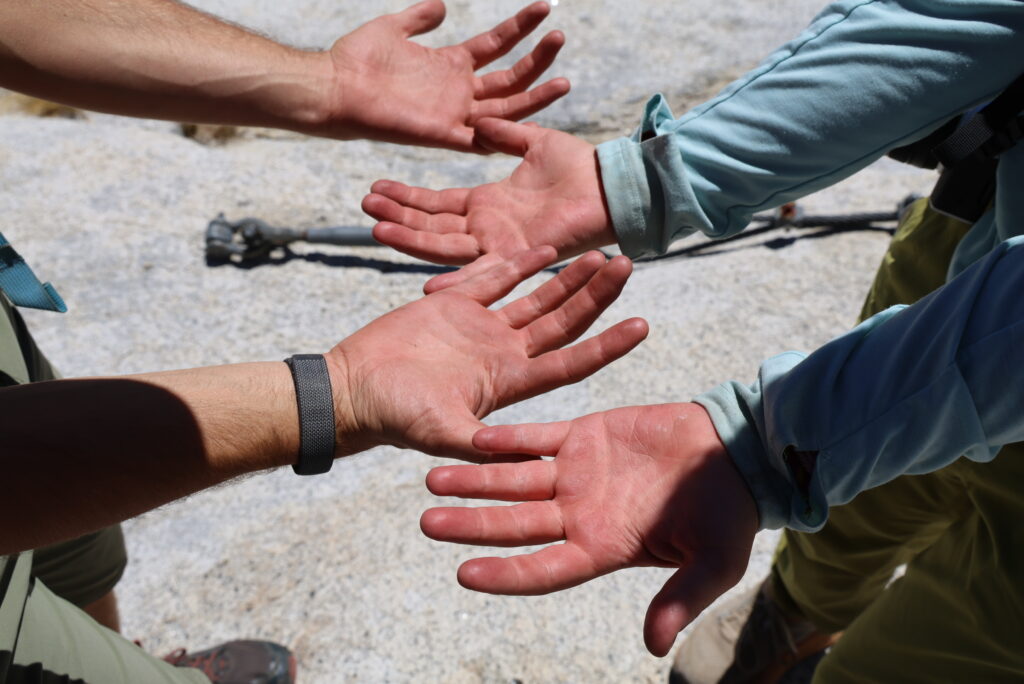
The cables are steel, you’re gripping them hard, and you’re doing it for a sustained period both going up and coming down.
NPS recommends sturdy gloves with good grip. (NPS)
I’d bring a pair next time.
And I’d bring them back down with me.
Do You Need to Clip Into the Cables?
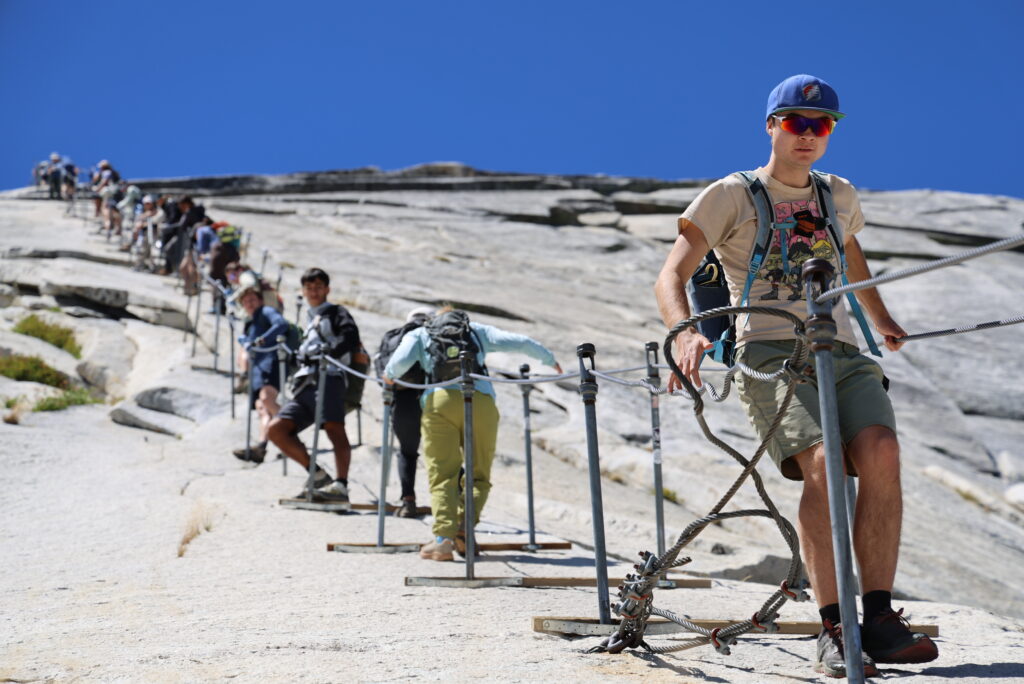
We saw quite a few people using harnesses or devices that allowed them to clip themselves onto the cables.
Personally, I wouldn’t bother when the cables are installed for the season.
The Half Dome cable route was specifically designed so hikers can ascend the final 400 feet without rock-climbing equipment. (NPS)
The cable isn’t one uninterrupted line. It’s supported by a series of posts, so someone using a clip-in system has to repeatedly stop, unclip, move past a support, and clip back in.
On a busy day, we found that people doing this tended to slow down the flow of hikers on the cables.
I understand why people do it. The exposure is intimidating, and being physically attached to something can feel safer.
But I don’t consider a harness or clip-in device necessary for hiking Half Dome with the cables up.
What mattered much more to me was:
- Good shoes with traction
- Keeping a solid grip on the cables
- Taking advantage of the wooden boards for rests
- Staying patient
- Giving other hikers space
- Not going up if the rock is wet
NPS’s own cable advice is similarly simple: take your time, be patient with slower hikers, allow faster hikers to pass when possible, and stay inside the cables. (NPS)
If you personally feel that you need a harness to be comfortable, that’s a different calculation. But don’t assume that clipping into the cables is standard equipment for Half Dome.
Most importantly, don’t let any piece of safety equipment convince you to climb in conditions you otherwise wouldn’t.
Do Not Climb Wet Cables
Weather deserves its own section because Half Dome is not a place to push your luck.
NPS says the leading cause of fatal falls on the Half Dome cable route is being on the cables when the rock and/or cables are wet. (NPS)
Thunderstorms create an additional problem. Half Dome’s summit is extremely exposed, and holding onto steel cables during a lightning storm is obviously not where you want to be.
Check the weather before leaving.
Keep checking the sky while you hike.
And if the granite is wet or storm clouds are approaching, turn around.
You can try Half Dome again.
Bring a Headlamp
Even if you’re starting at 5:30 a.m. and expect to finish well before dark, bring a headlamp.
Our hike took 11 hours elapsed.
A slower group, a long summit stop, congestion at the cables, a minor injury, or simply enjoying yourself along the way can easily add several hours.
NPS specifically recommends that every member of a Half Dome group carry a flashlight or headlamp. (NPS)
A phone flashlight isn’t what I’d want to depend on several miles from the trailhead.
Would I Hike Half Dome Without My Own Permit Again?
Yes.
But with an important qualification.
I would not hike Half Dome expecting to sneak past the permit checkpoint.
I’d hike knowing there was a real possibility I wouldn’t get beyond Sub Dome.
You can still have a fantastic day. Vernal Fall, Nevada Fall, Little Yosemite Valley, and the back side of Half Dome are all worth seeing.
And if you’re reasonably fit and willing to take the chance, I’d start talking to people.
Ask:
“Do you happen to have any extra spaces on your Half Dome permit?”
You don’t need somebody to give you their permit.
You need a permit holder who is already hiking Half Dome and has unused capacity in their permitted group.
That distinction made all the difference for us.
Nearly forty years after climbing Half Dome with my dad and cousin—when we woke up below Sub Dome and had Half Dome practically to ourselves—I climbed it again under a very different system.
This time it took a preseason lottery, multiple daily lottery attempts, several $10 fees, an 18-mile day, and three strangers we happened to meet below Nevada Fall.
I still preferred the permit system from the 1980s.
But making three new friends on the way up wasn’t a bad consolation prize.