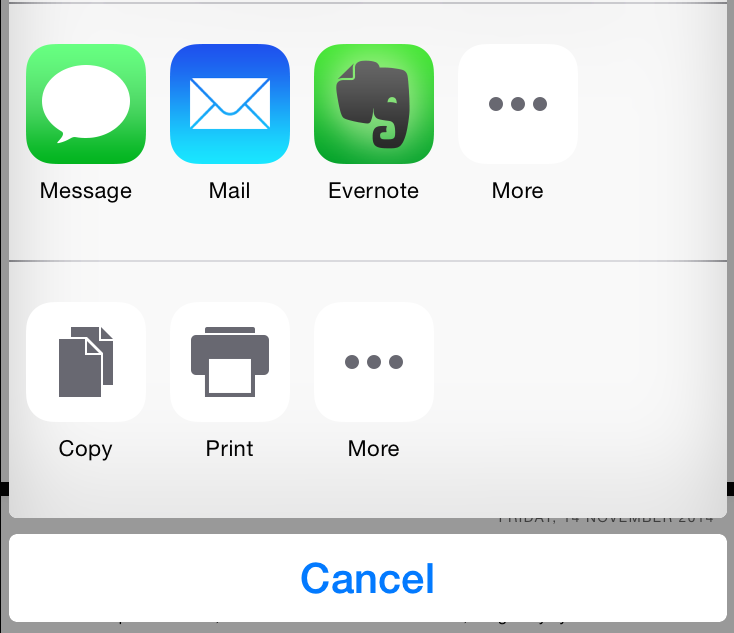
When I first released WebPDF, I used an UIActivityViewController to share the PDF. This only gave me a few apps to share to. I expected to see other apps that supported PDFs. Here is the code I used:
NSString* fileName = [NSString stringWithFormat:@"%@.pdf",
[self.detailItem valueForKey:@"pdfFilename"]];
NSString* filePath = [WebPDFUtils pathWithFilename:fileName];
NSArray *activityItems = @[[NSURL fileURLWithPath:filePath]];
UIActivityViewController *activityViewController =
[[UIActivityViewController alloc] initWithActivityItems:activityItems
applicationActivities:nil];
activityViewController.popoverPresentationController.barButtonItem = _shareButton;
[activityViewController setCompletionHandler:^(NSString *activityType, BOOL completed) {
[self dismissViewControllerAnimated:YES completion:nil];
}];
[self presentViewController:activityViewController
animated:YES
completion:nil];
Here is what the share sheet looked like:
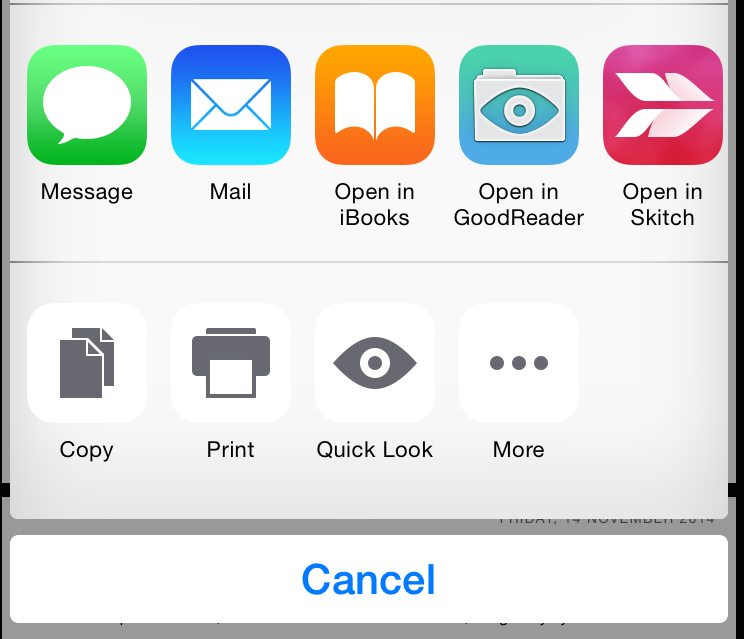
After searching around I found the UIDocumentInteractionController. I updated my code:
NSString* fileName = [NSString stringWithFormat:@"%@.pdf",
[self.detailItem valueForKey:@"pdfFilename"]];
NSString* filePath = [WebPDFUtils pathWithFilename:fileName];
self.documentInteractionController = [UIDocumentInteractionController
interactionControllerWithURL:[NSURL fileURLWithPath:filePath]];
self.documentInteractionController.delegate = self;
self.documentInteractionController.UTI = @"com.adobe.pdf";
[self.documentInteractionController presentOptionsMenuFromBarButtonItem:sender
animated:YES];
Here is what the share sheet looked like:
When should you use a UIActivityViewController vs a UIDocumentInteractionController. You should really read the Developer docs:
The UIActivityViewController class is a standard view controller that you can use to offer various services from your application. The system provides several standard services, such as copying items to the pasteboard, posting content to social media sites, sending items via email or SMS, and more. Apps can also define custom services.
UIDocumentInteractionController
A document interaction controller, along with a delegate object, provides in-app support for managing user interactions with files in the local system. For example, an email program might use this class to allow the user to preview attachments and open them in other apps. Use this class to present an appropriate user interface for previewing, opening, copying, or printing a specified file.
In general if you’re sharing an image or url, you might want to use a UIActivityViewController. If you’re sharing a document, you might want to use a UIDocumentInteractionController.
Comments closed